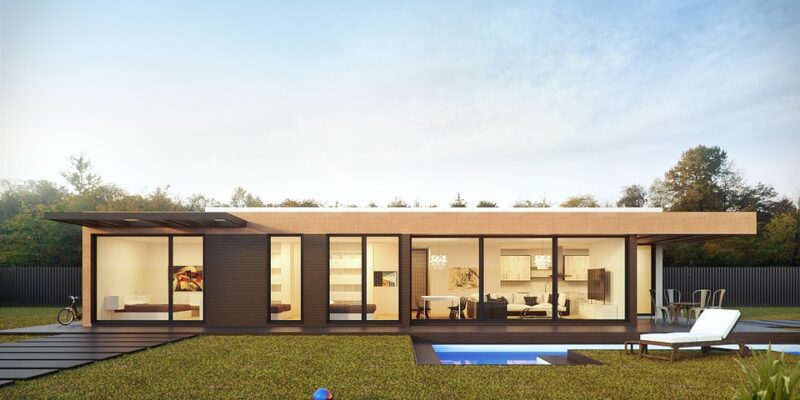
From sketches to photorealistic renderings: A step-by-step guide
Step 1: Sketching your idea
Sketching is the first and most crucial step in the process of creating photorealistic renderings. Before diving into the world of digital tools and software, it’s important to put your ideas down on paper. Grab a pencil and paper and start sketching out your design concept. This sketch doesn’t have to be perfect or detailed, but it should capture the overall concept and key features of your design.
Step 2: Digitalizing your sketch
Once you have a rough sketch of your design concept, it’s time to digitalize it. You can do this by scanning your sketch or taking a high-quality photo of it with your smartphone. Once you have a digital copy of your sketch, you can import it into a graphic design software like Adobe Photoshop or Illustrator.
Step 3: Creating the base model
In this step, you will create a base model of your design concept using 3D modeling software like SketchUp, Rhino, or Blender. Start by importing your digitalized sketch and use it as a reference to create a rough 3D model of your design. This will help you visualize your design in three dimensions and start adding details to it.
Step 4: Adding details and textures
Once you have the base model of your design concept, it’s time to start adding details and textures to make it more realistic. You can create custom textures or download them from online resources to add to your model. Pay attention to details like lighting, shadows, and reflections to make your design look more lifelike.
Step 5: Setting up the scene
Setting up the scene is an important step in creating photorealistic renderings. Think about the environment in which your design concept will be placed and create a scene that reflects this. You can add background elements, furniture, and lighting to make your rendering look more realistic.
Step 6: Rendering your design
Once you have added all the details and set up the scene, it’s time to render your design. Use rendering software like Lumion, V-Ray, or KeyShot to create high-quality photorealistic images of your design. Experiment with different camera angles, lighting setups, and materials to create the perfect rendering.
Step 7: Post-processing and editing
After rendering your design, you may need to do some post-processing and editing to enhance the final image. Use editing software like Adobe Photoshop to adjust colors, contrast, and other settings to make your rendering look even more realistic. You can also add effects like depth of field and lens flares to make your design pop.
Step 8: Presenting your photorealistic rendering
Once you are happy with the final rendering of your design concept, it’s time to present it to your clients or stakeholders. You can create a presentation with multiple views of your design, including close-ups and 360-degree renders. This will help your audience visualize your design concept in the best possible way.
Conclusion
Creating photorealistic renderings from sketches is a challenging but rewarding process. By following these step-by-step guide, you can bring your design ideas to life and present them in a visually stunning way. Remember to start with a sketch, digitalize it, create a base model, add details and textures, set up the scene, render your design, post-process and edit, and finally present your photorealistic rendering. With practice and patience, you can create stunning visualizations that will impress your clients and help you bring your design concepts to life.